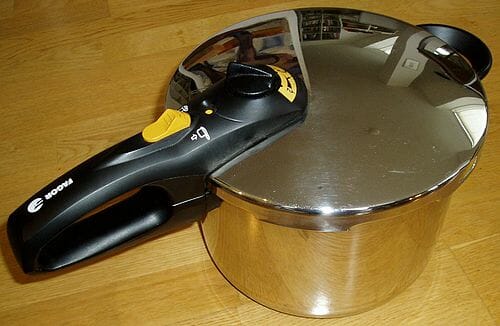
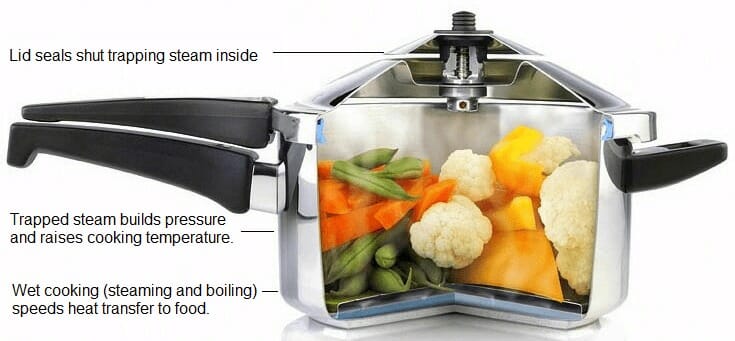
 Who doesn’t want to get their hands on the newly bought pressure cooker! You would want to take off the covers and take your cooker straight to the kitchen to try out your favorite recipe. We understand the emotions but wait, just slow down. How about taking a test drive first.
Before you go for cooking in a pressure cooker, we would say you take a few test of your pressure cooker. You will be able to figure out how it really works and so it can help you prepare your favorite recipe without risking your dinner.
Why go for a test Drive?
Pressure cooking is more of a science. This is why they can be a bit more costly than conventional cookers. Therefore, it is important that you know exactly how it functions. Regardless of the fact that you might be using a pressure cooker from the same company as previous, there are some variations attached to each individual unit.
When you test drive your cooker, you will come to know how quickly your cooker heats up and how much time it takes to build up optimum pressure inside it. There is a big factor involved i.e. each food takes its own time to cook, but the general settings for a pressure cooker remain same throughout.
Test driving is even more important when you are using a second hand pressure cooker. It will ensure either your cooker is in working condition or not.
What to Use for Test Driving?
Once you have made up your mind for testing your pressure cooker, we can move forward and discuss the essentials for pressure cooking. Now there can be various techniques to determine the performance of a pressure cooker. We will stick to the general methods which are more common and easy to execute.
Here is a list of what you will require while testing your pressure cooker:
- Pressure cooker (of course)
- Water
- A Cup with measurements
- Timer or a clock
- Pencil and paper for noting down important calculations
Preparing for the test
Here is what you should consider before starting with the test. This phase is of quite importance and it can save you from potential harms during the testing phase.
- Examine the gasket and seal. Ensure that they are in a good condition. Especially in second hand cookers, the gasket may but cut from one or more places.
- Make sure the vent of the cooker is clear. It is quite important because excess heat is passed out through the vent to keep the temperature and pressure inside the cooker constant.
- Check for cleanness of your cooker. It should be neat and clean from both inside and outside.
- Look closely for any leaks or holes that might be present in your pressure cooker. Normally it doesn’t happen but it is always good to check your cookers.
Starting the Test
Firstly, add two cups of water to your pressure cooker. Lock your pressure cooker and then let it rise to the highest pressure. Bring the heat down to minimum as soon as it reaches the peak pressure in order to maintain the pressure inside. By doing so, you can stabilize the pressure inside. It will let you find out the right heat setting for your pressure cooker.

Keep the heat setting constant for a while and then note down the temperature. Once you are satisfied with the setting, note down the readings. You can now move forward to testing the water level.
Troubleshooting
There are some obvious events that will determine whether your pressure cooker is working fine or not. Normally, it could be a loud hiss or steam escape. In case there is excess steam escaping from your cooker other than the vent, there is problem with your gasket and seal of the lid. However, these are easily replaceable. To ensure better performance for future, it is better that you let the manufacturer do the replacement.
Water Droplets around the Jiggle Top
Initially when you turn on the pressure cooker, you will observe some water droplets around the indicators especially jiggle top ones. This is not a point of concern though. The water will go away in a while. Also, the water splutters around the jiggle top until the pressure is full. If the water doesn’t stop spluttering around, it means that the highest pressure isn’t reached.
If this happens, you should take off the lid and reinstall the lid. Normally the sealing isn’t rightly adjusted so the problem occurs. However, if the problem still persists, there is a problem with any of the rubber parts in your pressure cooker.
Also, it could be that your vent and pressure release point are clogged. Make sure you clean them well so that the steam can pass through.
Water around the Rim
This is a crucial situation. If there is water around the rim of the lid or anywhere under it, you should stop heating the cooker instantly. Take cold water and using the cold water release method, clear out the vent of your cooker.
The reason for this water leakage could be cracks and cuts in your gasket. It could also be that your cooker is dented or bent from where your lid should be placed. Never use a cooker that doesn’t lid up properly. There is a risk of the lid bursting out during cooking.
Pressure Release Method
There are several pressure release methods. Cold water release and natural release methods are more suitable to help you understand your pressure cooker’s performance. Note down how much time each of these methods take.
The Old Pressure Cookers
If you have purchased an old pressure cooker or if you have a liking for vintage models, you have to be more careful and there should be a much strict checking of all the safety elements in your cooker. You can have a bit of trouble with fittings of your cooker and there will be occasional replacements of parts. Therefore, to keep yourself from such hassles, it is better that you buy a new unit once in for all.
Leave a Reply